
Probably used in all these models:
42LF5800, 42LB5800, 49UH6030, 55LB6100, 55LF6090, 55LB5900, 55LB6500, 55LB5550, 55LB6300, 55LY340C, 39LN5300, 39LN5700, 42LF5600,
42LX330C, 42LB5500, 60LB6100, HC600DUF, 50LN5750, 50LN5400, 50LN5100, 50LN5200, 50LN5700, 50LN5600, 42LB5800, 42LB5600, 50LB6500, 47LB5800, 47LB5900, 47LB6100,
47LB6300, 60LF6090, 60LB6000, 32LY340C, 42LB6300, 39LB5800,
39LY560H, 32LB560B, 32LB561V, 42LY560M, 60LB7100, 49UF6400, 40LX560H, 65LB6300
Not following the recommendations here may result in this:

1.
Buy the correct LEDs. I got mine from eBay. These are 6V LEDs with the anode being the larger pad.
My very first attempt was to buy from digikey some "cool white" LED I thought could be working but they didn't have the same color temperature. You will find a better description of what to look for in the below video.
2.
The LED strip is glued with strong double sided tape to the back metal cover. I would not remove the strip to repair single LEDs in this case because by doing so the strip will be bend and the solder joints will be stressed and might break without noticing.
Use a hot air gun or two soldering irons to remove the defective LED.

3.
Clean the solder pads with solder wick.

4.
I prefer putting solder paste on the pads, that way I'm sure the new LED will be soldered underneath.
Press down the LED carefully then heat from the side with a soldering iron on both sides.


5.
Clean the lens. The faulty LEDs seem to overheat and cause some deposit to accumulate on the inner cone of the lens. This part of the lens must be absolutely clean. Do not use acetone (nail polish remover) , use non aggressive chemicals only, I used alcohol.
 before
 after
after 6.
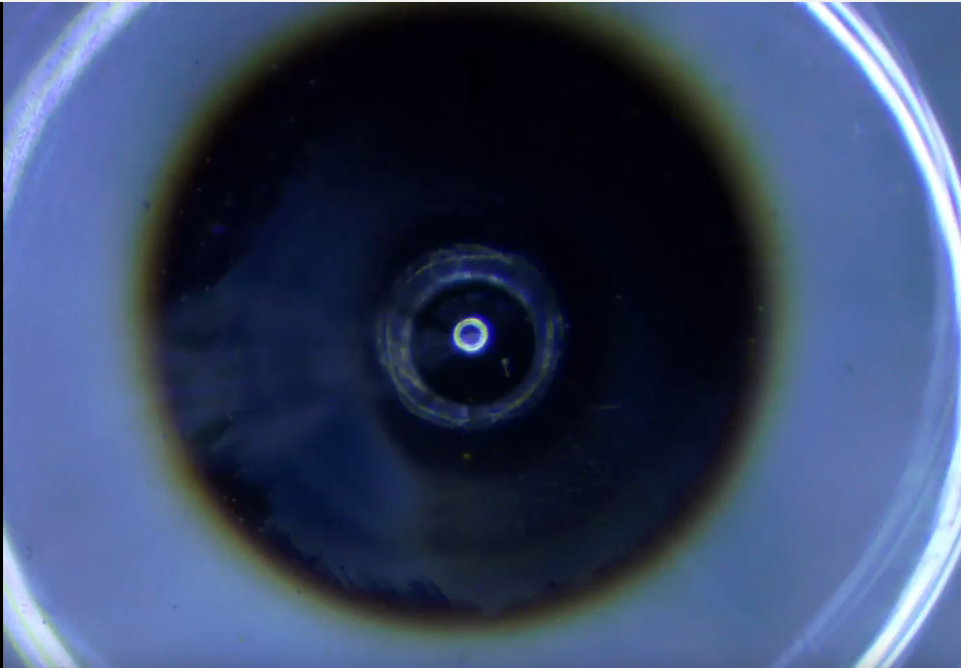
To correctly adjust the lens I recommend cutting out a piece of an old diffuser sheet from a TV and place it on top of the lens. Light up the new LED, put some glue on the protrusions underneath the lens and adjust the lens position to get a perfectly symmetric silhouette.
 good
good  BAD !
BAD !7.
Put the original diffuser sheet on the LEDs (with the little standoffs), and power up a whole LED string with an external power supply. Confirm that it looks good, The light/shadows from all replaced LEDs should look symmetric, original and new LEDs should be almost indistinguishable. Slight differences in brightness don't matter.

8. Put everything back together and enjoy your TV.
That's it good luck
Hello, I'm from Brazil and I did not get the legible scheme of EAX 61397101.
ReplyDeleteCan you get me?
If you have sent me in the email:
eletronicapinokio@gmail.com
ac repairing courses in patna
ReplyDeleteWINDOW AC repairing courses in patna
SPLIT AC repairing courses in patna
CAR AC repairing courses in patna
Plant AC repairing courses in patna
washing machine repairing courses in patna
ro repairing courses in patna
fan repairing courses in patna
led repairing courses in patna
lcd repairing courses in patna
smart tv repairing courses in patna
laptop repairing courses in patna
desktop repairing courses in patna
computer repairing courses in patna
fridge repairing courses in patna
mobile repairing courses in patna
motor repairing courses in patna